Running minikube on AWS EC2
This tutorial covers running minikube on an AWS EC2 instance, useful when you want to run your Kubernetes development cluster on a remote machine instead of locally.
Why run minikube on EC2
Most people should run minikube locally — it’s simpler. But a few cases where running on EC2 makes sense:
- Your laptop can’t handle it. 4–8 GB RAM machines running Docker, an IDE, and browser tabs often can’t fit a minikube cluster on top.
- Corporate-managed laptops. IT-locked machines where you can’t install Docker, KVM, or other drivers locally.
- You don’t want minikube draining battery and heating your laptop.
- You need a cluster that outlives your laptop session — for testing webhooks, long-running jobs, or async systems.
- You already develop on a remote VM (cloud workstation, SSH’d EC2, VS Code Remote).
- You need a stable endpoint for teammates or external tools to hit your dev cluster.
If you’re already running minikube fine on your laptop, you don’t need this guide.
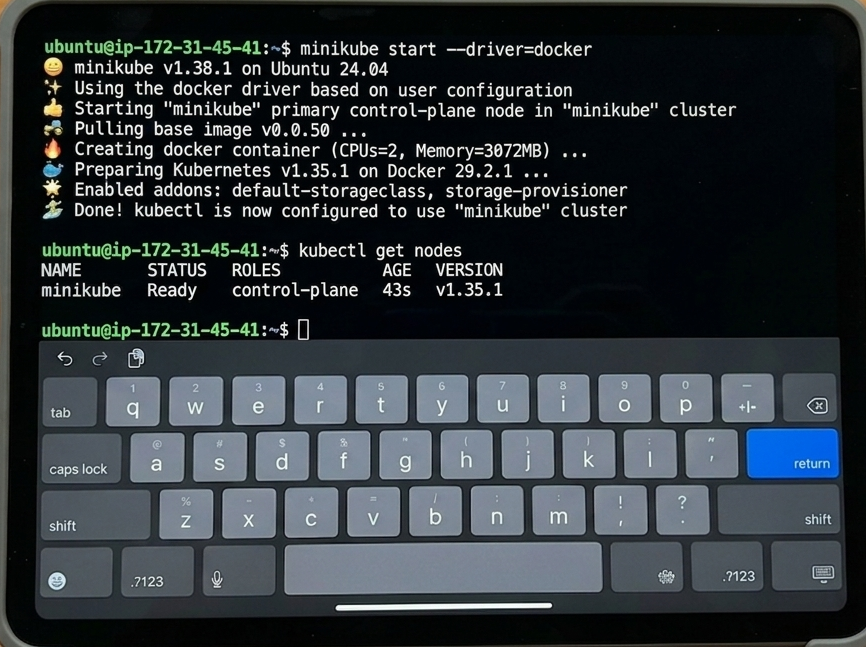
Above: minikube running on an EC2 t3.medium, accessed from an iPad over SSH. The iPad itself can’t run minikube — but it doesn’t need to.
Prerequisites
- An AWS account with EC2 access
- Basic familiarity with SSH and EC2
- A key pair for SSH access
Choosing an EC2 instance type
minikube requires at least 2 CPUs and 2 GB RAM to start (this is a Kubernetes requirement, not a minikube limitation). On AWS EC2:
| Instance type | vCPUs | RAM | Works? | Notes |
|---|---|---|---|---|
t2.micro |
1 | 1 GB | ❌ | Free tier, but minikube refuses to start: “Requested cpu count 1 is less than the minimum allowed of 2” |
t3.small |
2 | 2 GB | ⚠️ | Meets minimums but tight; expect OOM under load |
t3.medium |
2 | 4 GB | ✅ | Recommended minimum for comfortable use |
t3.large |
2 | 8 GB | ✅ | Better for running multiple workloads |
For a development/learning setup, t3.medium is the practical minimum. Pricing varies by region and over time — as a rough guide it costs a few cents per hour in most regions (check the current EC2 pricing for your region). Always stop the instance when you’re not using it to avoid charges.
Launch the EC2 instance
- In the AWS console, launch an EC2 instance with:
- AMI: Ubuntu Server 24.04 LTS (or newer, e.g. 26.04)
- Instance type:
t3.medium - Key pair: your existing SSH key
- Security group: inbound SSH (22) from your IP
- Storage: at least 20 GB (the default 8 GB fills up fast with Docker images)
- SSH in:
ssh -i ~/your-key.pem ubuntu@<EC2_PUBLIC_IP>
Install Docker
minikube needs a container engine on the host to run the cluster. We’ll use the docker driver — the most common choice on Linux. Install Docker Engine (the vendor docker-ce package) by following the official Docker Engine install guide; note minikube’s docker driver expects vendor Docker rather than the distro docker.io package (see the docker driver docs). podman is also supported as an alternative, though it has known issues on some setups. Other drivers (none, kvm, ssh) exist for different scenarios — see the drivers documentation for the full list.
# Install Docker Engine (vendor docker-ce) — follow the official guide:
#   https://docs.docker.com/engine/install/ubuntu/
sudo systemctl enable --now docker

# Add your user to the docker group so you can run docker without sudo
sudo usermod -aG docker $USER
newgrp docker

# Verify
docker run --rm hello-world
Install minikube
See the official install guide for full options. The quick Linux path:
curl -fSLO https://storage.googleapis.com/minikube/releases/latest/minikube-linux-amd64
sudo install minikube-linux-amd64 /usr/local/bin/minikube
rm minikube-linux-amd64

# Verify
minikube version
Install kubectl
See the kubectl handbook for usage tips with minikube. The quick install:
curl -fSLO "https://dl.k8s.io/release/$(curl -fSL https://dl.k8s.io/release/stable.txt)/bin/linux/amd64/kubectl"
sudo install kubectl /usr/local/bin/kubectl
rm kubectl

# Verify
kubectl version --client
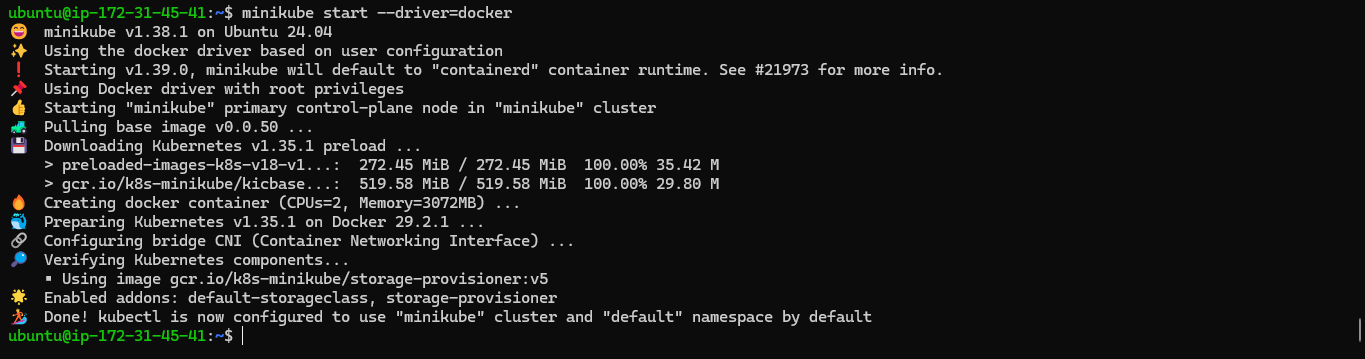
Start your cluster
minikube start --driver=docker
The first start downloads the base image (kicbase) — about 500 MB. Subsequent starts are much faster. You’ll see something like this:
Verify the cluster is running:
kubectl get nodes

Stopping your cluster (and the EC2 instance)
When you’re done for the day:
# Stop minikube (keeps the cluster state on disk)
minikube stop
Then stop the EC2 instance from the AWS Console — Instance State → Stop. A stopped EC2 instance costs near zero (you only pay for the attached EBS volume). When you’re back, Start the instance and minikube start picks up where you left off.
Don’t forget this step. A running t3.medium costs roughly a dollar a day depending on region; a stopped one costs only a few cents per month for storage.
Accessing services from outside the EC2 instance
When minikube exposes a service, it binds to the EC2 instance’s internal network — not the public internet. To reach it from your laptop, you need an SSH tunnel.
Get the service URL inside the EC2 instance
minikube service your-service --url
# http://192.168.49.2:30000
That URL only works inside the EC2 instance. Note the IP and port — you’ll tunnel to that next.
Forward it to your laptop via SSH
From your local laptop:
ssh -i ~/your-key.pem -L 8080:192.168.49.2:30000 ubuntu@<EC2_PUBLIC_IP>
Replace 192.168.49.2:30000 with the URL minikube service gave you. Now http://localhost:8080 on your laptop hits the service inside minikube on EC2.
This works for any minikube service. If you’d rather not expose your service via NodePort, kubectl port-forward svc/your-service 8080:80 (run inside the EC2 instance, then tunnel to it the same way) is an alternative.
Troubleshooting
ErrImageNeverPull after building an image locally
If you build an image directly on the EC2 host and reference it in a pod with imagePullPolicy: Never, minikube can’t see it — minikube has its own container runtime inside the cluster, separate from the host’s Docker daemon.
Cleanest fix: build the image inside minikube directly. No saving or loading needed:
minikube image build -t my-app:dev .
If you’ve already built the image on the host, load it into minikube instead:
# Build your image normally on the host
docker build -t my-app:dev .

# Load it into minikube's container runtime
minikube image load my-app:dev

# Now the pod can find it
kubectl apply -f my-pod.yaml
eval $(minikube docker-env) is another option — it points your shell at minikube’s internal daemon so you can build there directly — but it’s a compatibility layer for the Docker driver, and minikube image build is the more durable path. A local registry is also an option, though more involved to set up.
“Requested cpu count 1 is less than the minimum allowed of 2”
You’re on t2.micro (1 vCPU). Kubernetes requires at least 2 CPUs to run a control plane, which is why minikube enforces this minimum. Resize to t3.medium or larger — see the instance sizing section above.
Cluster is slow or pods get OOM-killed
Your instance is RAM-starved. Check usage:
free -h
If you’re consistently above 80% memory use, bump to t3.large (8 GB RAM). Workloads with heavy controllers (Prometheus, Argo, etc.) typically need 8+ GB.
Disk fills up over time
Docker images and minikube’s storage build up. Free space:
df -h /
If / is above 80%, clean up:
docker system prune -a
minikube delete   # destroys the cluster — you can recreate it in seconds with minikube start
You can also resize the EBS volume in AWS Console without losing the instance.
Next steps
- Deploy your first app: Hello minikube
- Try multi-node clusters: multi_node tutorial
- Explore add-ons:
minikube addons list
See also
- Drivers documentation — full list of supported minikube drivers
Notes
minikube is not intended for production Kubernetes hosting — for that, use a managed or self-managed Kubernetes cluster (see the Kubernetes production environment docs). This guide treats EC2 as an extension of your local development environment, like a remote dev box.
This page refers to third-party products and services (Amazon EC2, Ubuntu). The minikube project authors aren’t responsible for those third-party products or services. See the CNCF website guidelines for more details.
Feedback
Was this page helpful?
Glad to hear it! Please tell us how we can improve.
Sorry to hear that. Please tell us how we can improve.